Suricata is a very powerful open-source NDR/IDS that can monitor network traffic and detect malicious or suspicious activity. There is a lot to get your head around in this complicated piece of software but today we’re just going to look at the basics of getting it up and running, installing rules and writing our own signature.
To start, let’s power up our Kali attack box and see if we have Suricata installed.

We don’t have it installed so the next step is to install it. In our case I have used apt.
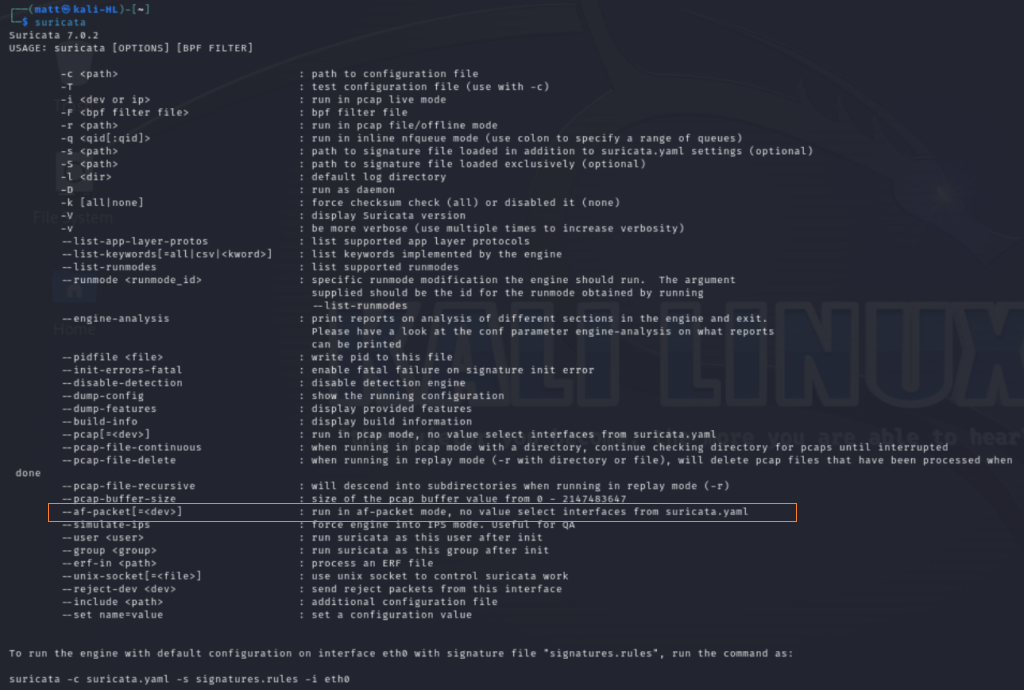
sudo apt install suricataWhen we run Suricata from the command line with no arguments it gives us the help page with all the options that we can use.

For this exercise we will run Suricata with the <–af-packet> mode option with the interface <eth0>.
AF_PACKET (Advanced Packet Socket) is a socket type in Linux that provides a way for applications to receive (in our case) or send raw packets directly from or to the NIC. It allows the capture and analysis of packets at a low level.

This is what happens if you don’t run it as root or with sudo

Suricata is running. Looking above we can see that no rules files were loaded so we better download some rules. But first lets stop Suricata with <ctrl + c>.
An easy way to download open source rules is using the built in utility <suricata-update>

Once we have updated our rules lets try to run Suricata again with af-packet.

Now Suricata is running with no errors or warnings.
To view the Suricata log file navigate to:
sudo tail /var/log/suricata/suricata.log
To test Suricata alerts we can use the method mentioned in the Suricata Quick Start documentation 2.5 Alerting. This involves triggering the rule with sid: 2100498. You may notice that the documentation uses <tail -f> to view the log. The -f flag appends new data as the file grows and is what should be used when you want to dynamically view the log file for example during testing.

As we can see above to trigger the rule we curl the following URL.

When we view the log file again we see the expected alert in the log.

Now lets move on to creating our own custom signature.
Creating a custom rule
First we take a look at the configuration file <suricata.yaml> found in /etc/suricata/. Here we navigate to the default rule path and rule files and add a file to have our custom rule in. This is located at the very bottom of the config file or you can search default-rule-path in nano by pressing F6.

We insert /etc/suricata/rules/local.rules under rule-files:, which is the absolute path to our custom rule file.
When writing our custom rule, we can go back to the manual section on rules and use it as a reference:
https://docs.suricata.io/en/suricata-6.0.0/rules/intro.html

Further details can be found in the documentation at the link.
For our example we will create a rule that generates an alert when the home network is pinged with an ICMP packet.
alert icmp any any -> $HOME_NET any (msg: "You're being pinged mate!"; sid: 9000001; rev: 1;)Breakdown of the rule:
alert: generate an alert (other options are pass, drop and various forms of reject)
icmp: This keyword tells Suricata which protocol to look at (an example of other options are tcp, udp, http, ftp, etcetera)
any any -> $HOME_NET any: These are source, port, destination, port. For our rule, we are telling Suricata to alert for incoming from any source IP and port to any IP on our network as defined in the yaml file on any port. We didn’t change the yaml file so the IP ranges covered are the RFC 1918 networks AKA private network IP addresses. The arrow indicates the direction that the signature must match in (generally always to the right but can also be both ways).
(<keyword>: <setting>; ): The remainder of this rule are options which are enclosed between parenthesis and separated by semicolons. There are a huge number of options keywords which you can dig into in the documentation from 6.2 onwards. In this case we have gone with the absolute minimum of options.
msg: “You’re being pinged mate”: This meta setting has no effect on Suricata’s inspection and is for giving a message or textual information about the signature/alert. The message must be in quotation marks.
sid: 9000001: This is to give the signature a Signature ID. Each signature must have its own unique number. It is recommended to use a value above 9,000,000 so that it doesn’t clash with an existing rule.
rev: 1: The sid keyword is almost always accompanied by the rev keyword which represents the version of the signature. It is convention that sid and rev are the last of all keywords and always in that order.
Now that we have created our signature, we must create the custom rules file.
sudo touch /etc/suricata/rules/local.rulesNext open the file with your favourite text editor and type in the signature. I’m using nano.
sudo nano /etc/suricata/rules/local.rulesTesting our custom rule and alert
To test if our custom rule works lets get Suricata searching again.

Then lets ping it from another machine on the network.

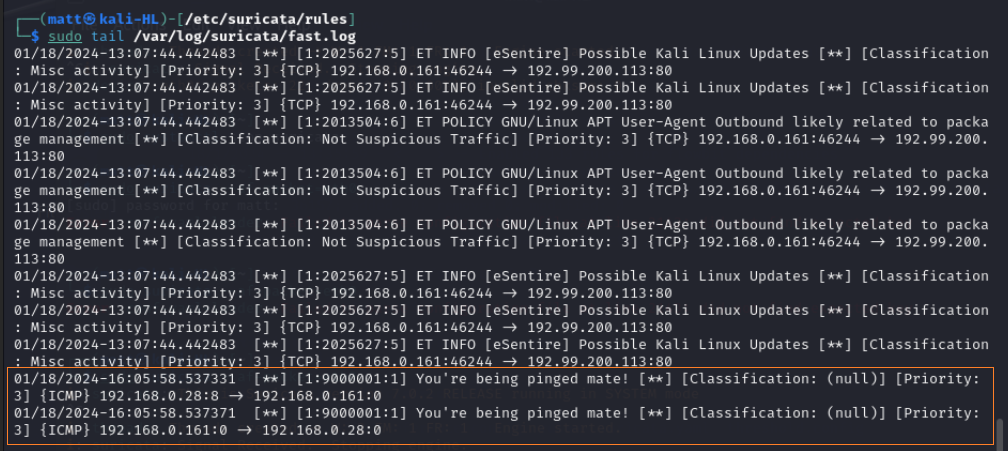
And finally lets check the alerts log again.

Here at the bottom of the log we can see the most recent two alerts are for our pings!
In the future I plan to configure Suricata to run as an IDS service on my home lab and eventually as an active IPS. In addition I want to delve into other third-party rulesets, JA3 and custom visualisations of alerts.
Thank you for reading!
